Creating a new label design
Ways to start
From the Dashboard, choose Design a label, then pick one of:
- Browse ready-made designs — open the Design gallery and start from a sample
- Start from a sheet or roll — match a manufacturer template (search like
Avery 5160or4x6) - Start from scratch — choose shape and size yourself
You can also open Sheets and rolls and choose Design a label on a template row.
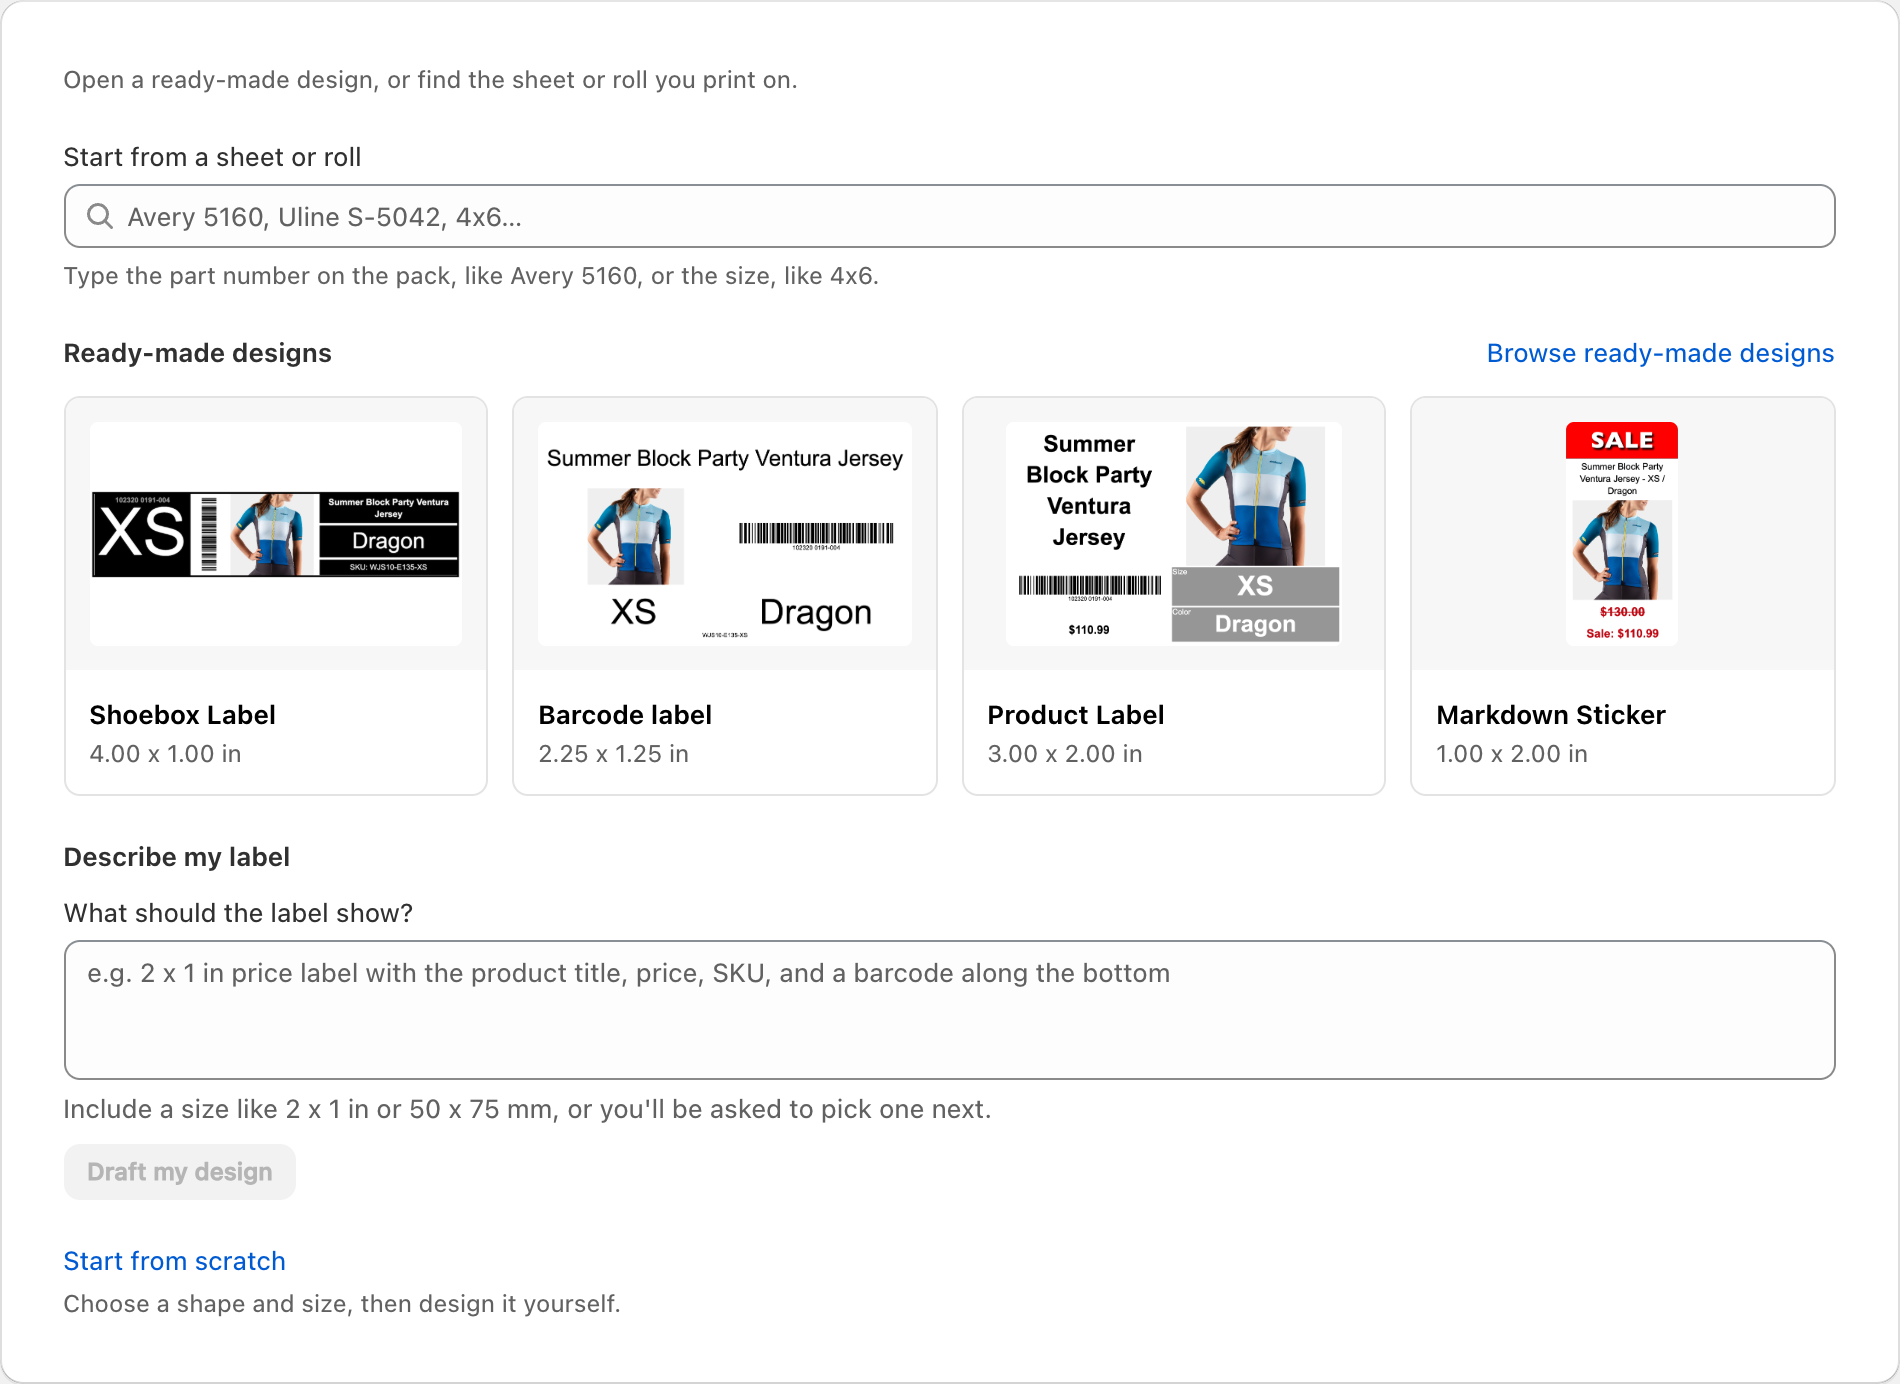
Start from scratch
- Choose Start from scratch.
- Select a shape (rectangle or circle).
- Choose a size:
- Sheet or roll size — pick from the catalog
- Custom size — enter length/height (or diameter for circles) in your preferred unit
- Confirm to open the editor.
Portrait and landscape
In the editor you can switch orientation when your label size allows it (for example Switch to portrait / Switch to landscape). Orientation changes how content fits the printable area; it does not change your physical stock size.
Save your design
- Give the design a clear name.
- Choose Save.
- Find it later under My designs / Your designs on the Dashboard.
Unsaved work may show as Draft (Unsaved). Leave the editor carefully if you have unsaved changes.
Related articles
- Using the label editor
- Finding your label sheet in Sheets & Rolls
- Using the Library of ready-made designs
Updated on: 09/10/2026
Thank you!